The Kiosk contains a Pay at Counter button which can be configured to appear on the Kiosk screen. If this button is not required, it can be hidden.
When the Pay at Counter button is pressed, the order will be saved as a Pending Sale and a receipt printed.
The consumer can then go to a standard Idealpos POS Terminal which is currently open and being staffed by a Clerk to pay for their order.
Pending Sales will require the POSServer to be configured and enabled.
The PC that is running the POSServer must be powered on.
For further information about configuring POSServer, refer to the POSServer topic.
For further information about configuring Pending Sales, refer to the Pending Sales topic.
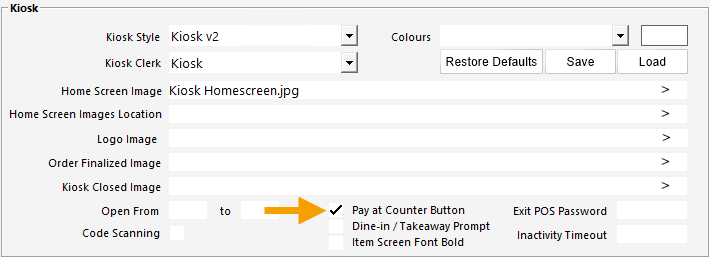
To set the Pay at Counter button as visible, go to: Back Office > Setup > POS Terminals > Select the Kiosk Terminal > Modify > Display/Kiosk.
Enable the 'Pay at Counter Button' checkbox.
Note!
When enabling the Pay at Counter Button, it is recommended that the "Print to Docket Printers" option is disabled for Pending Sales.
By disabling this option, the Pending Sale will not print to the Kitchen Printers after the customer presses the Pay at Counter button.
The Kitchen Printers will only print the Pending Sale after the Pending Sale has been paid at a standard POS Terminal.
Stopping the printing of Pending Sales before a customer has paid will prevent wastage as well as preventing Stock Write-Offs if a customer places an order on a Kiosk and then leaves the venue without paying at the counter.
Go to: Back Office > Setup > Global Options > Sales > Pending Sales > Disable the checkbox "Print to Docket Printers".
A Close Suite/Open Suite may be required for the change to take effect.
Note that this option will also affect standard POS Terminals (saving a Pending Sale from a standard POS Terminal will only print the items to the Docket Printers after the Pending Sale is paid).
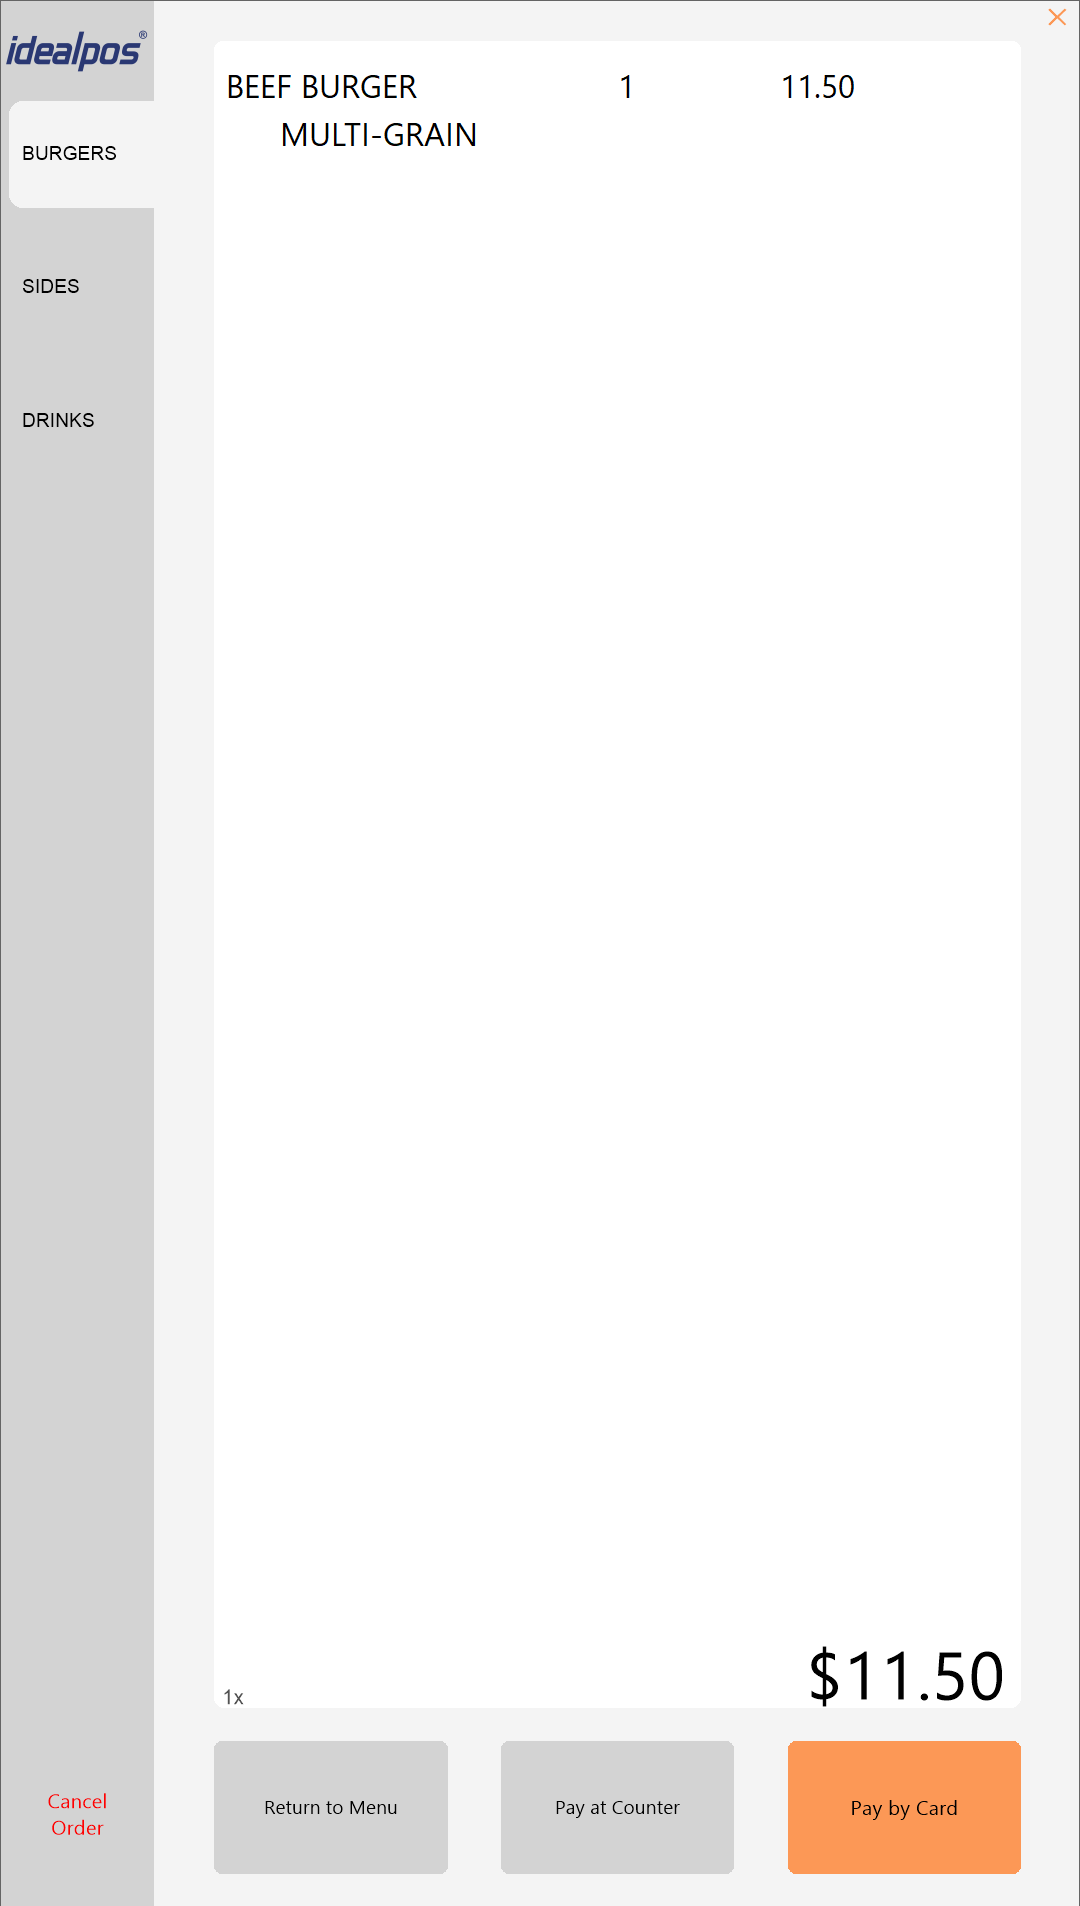
As a basic demonstration of the Pay at Counter button, the Consumer will add their items to a sale.
The consumer will then press the 'View Order' or 'Checkout' button, then the 'Pay at Counter' button.
Note!
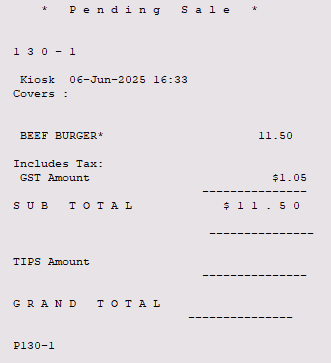
By default, the Kiosk will not print a 'Pay at Counter' receipt for the Customer (the Pay at Counter receipt is basically a Pending Sale bill).
To enable the printing of a Pending Sale bill, the 'Print as Bill to Receipt Printer' option must be enabled.
To enable this option, go to: Back Office > Setup > Global Options > Sales > Pending Sales.
Enable checkbox 'Print as Bill to Receipt Printer'.
When this option is enabled and the Customer presses the 'Pay at Counter' button, a receipt will be printed to the Kiosk's Receipt Printer (as configured in Network Printers - Back Office > Setup > Network Printers).
More information about configuring Network Printers is available in the Network Printers topic.
The Kiosk will print a bill for the consumer to take to the counter if the "Print as Bill to Receipt Printer" option is turned on, as per the note above.
The bill will contain an order number, their ordered items and the total amount.
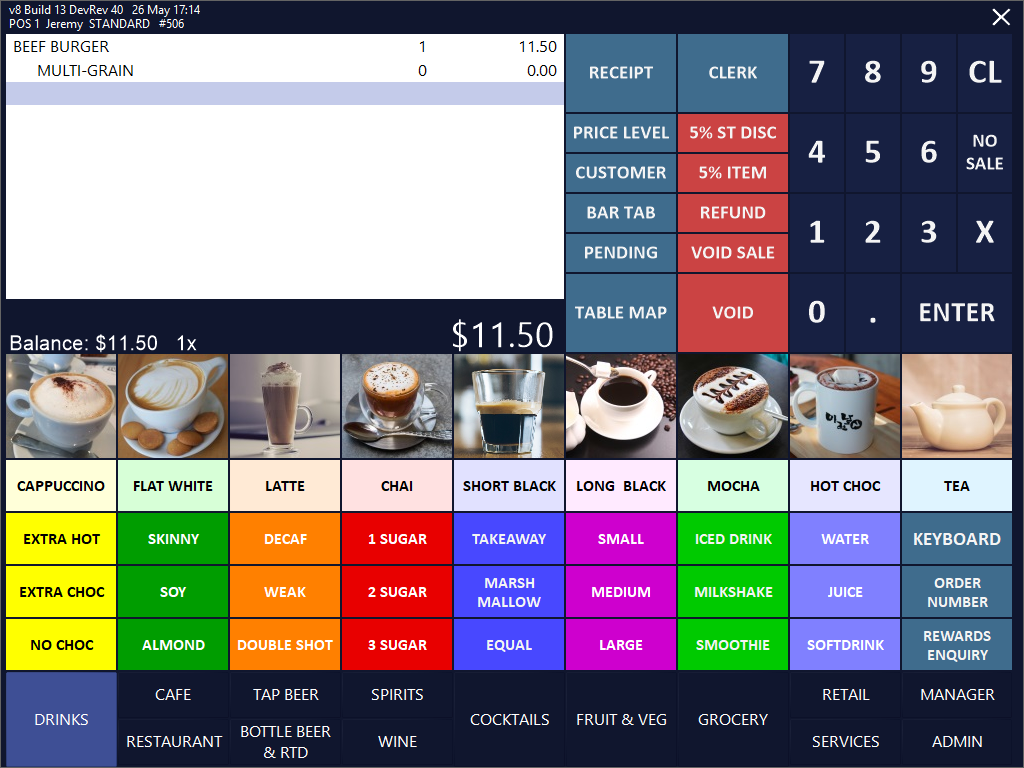
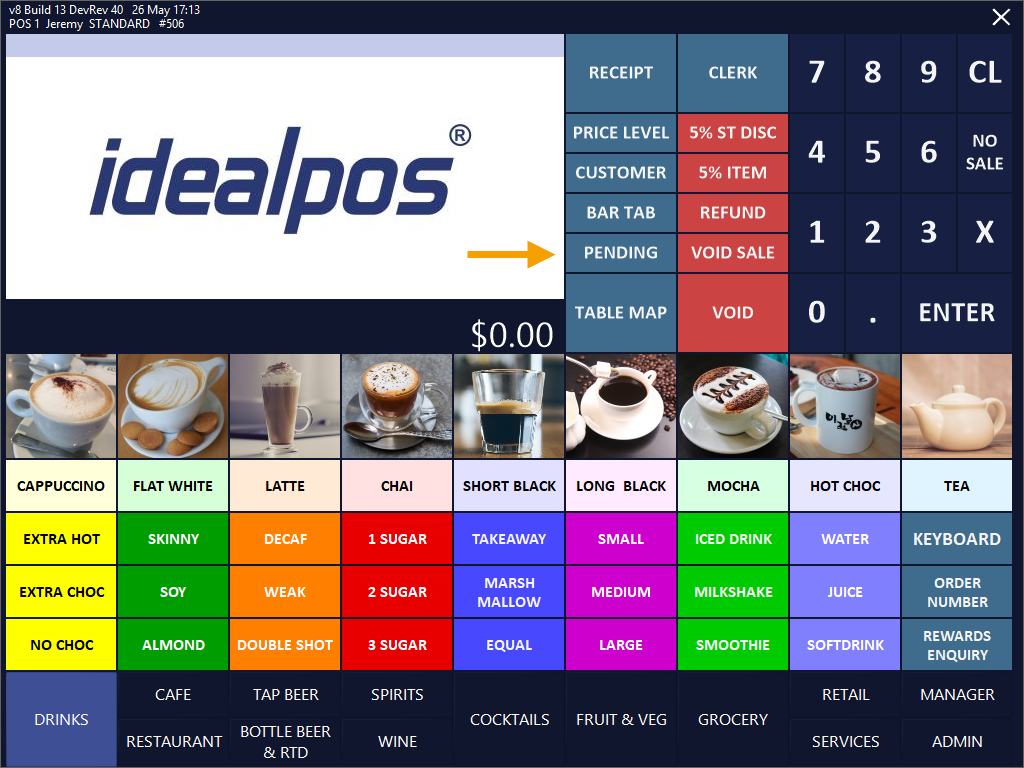
The Clerk at a standard Idealpos POS Terminal can press the PENDING sale button:
A list of Pending Sales will be displayed; the consumer's Pending Sale (i.e. 'Pay at Counter' sale will be displayed in the list).
The Clerk will select the sale and press the 'OK' button.
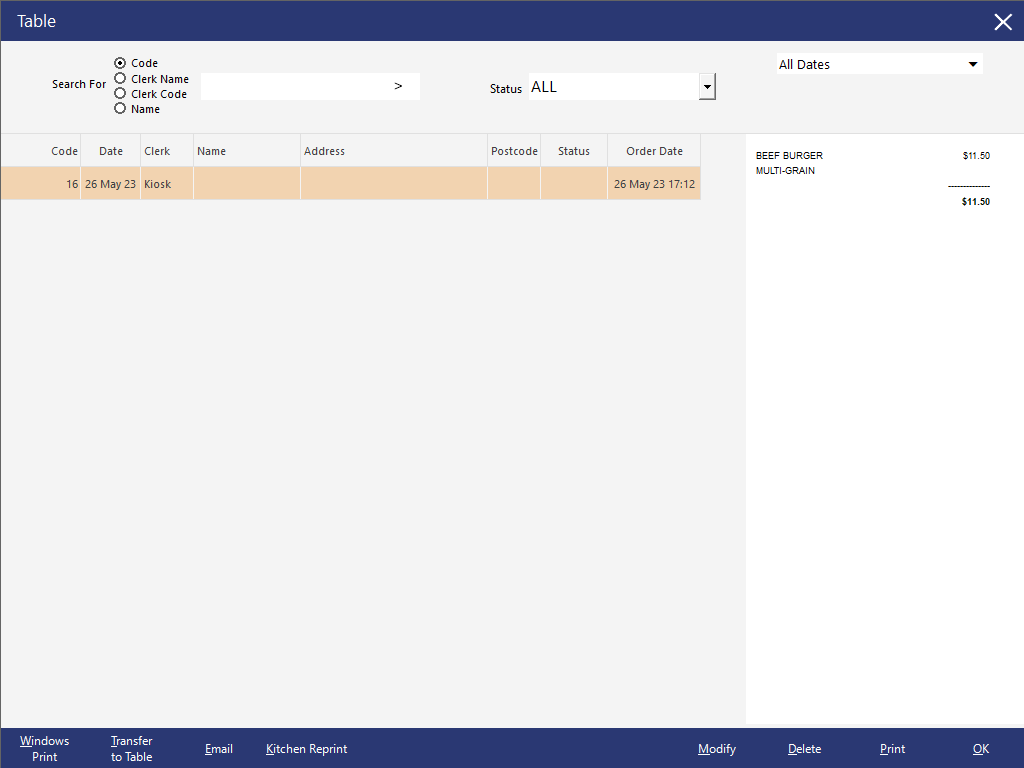
The items that the consumer selected at the Kiosk will be added to the sale screen.
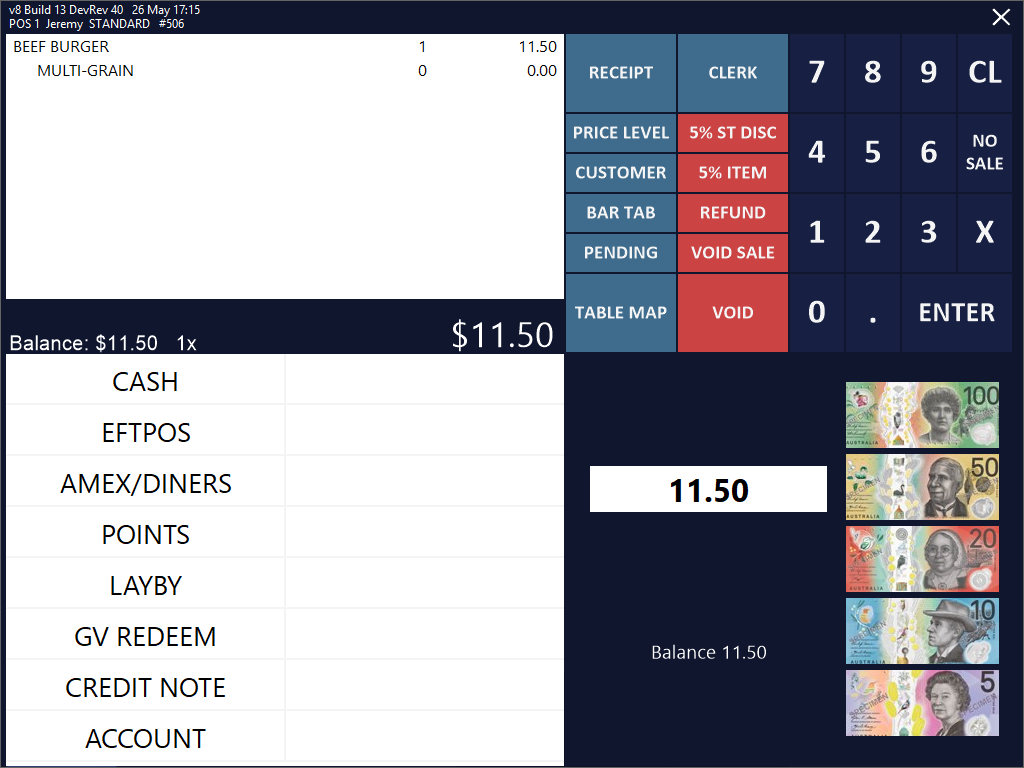
The Clerk can add any other items (if required), then press the ENTER button to go to the Tender screen and take payment from the consumer.